Ghostwire Tokyo After The End: How To Get The Full Ending

The Ghostwire Tokyo After The End quest is just one of many in the game that can be missed before finishing the game. As an open-world game, Ghostwire Tokyo has many of the trappings of the genre: A map you need to unlock by visiting various points, lots to collect, and side missions to complete. Thankfully, there isn’t much you can miss out on by playing through the game normally... in fact, there is only one series of missions that can be missed and the game will warn you before you do. Here is everything you need to know about After The End, Ghostwire Tokyo’s missable mission.
- Tracking down those pesky Tanukis? We're here to help, with our guide on finding all 25 Ghostwire Tokyo Tanukis.
Ghostwire Tokyo After The End: How Can It Be Missed?
 Click to enlarge
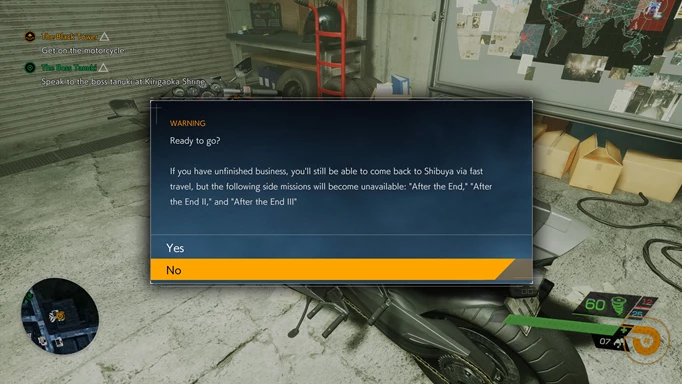
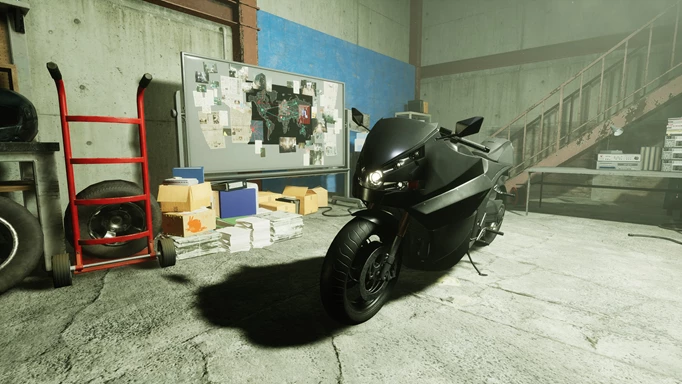
While progressing through the story you will reach a certain point in chapter four. Without spoiling much, you will enter a building, head down to the basement and find a motorbike. You need to gather materials to repair the bike, and once done you will use it to progress to the next part of the game. Up to this point, you are totally safe, and once you repair the bike you will be informed that, while you will return to the open-world afterwards, if you continue you will be locked out of the side missions After The End I, II, and III.
Feel free to play through the story up to this point, but be sure to head back out and complete these side missions before going any further if you want to be sure you complete the whole game.
- Finding all the Jizo Statues is an important part of upgrading your magical abilities. For more on that, check out where to find all 52 Ghostwire Tokyo Jizo Statues.
Ghostwire Tokyo After The End: How To Complete The Side Mission
 Click to enlarge
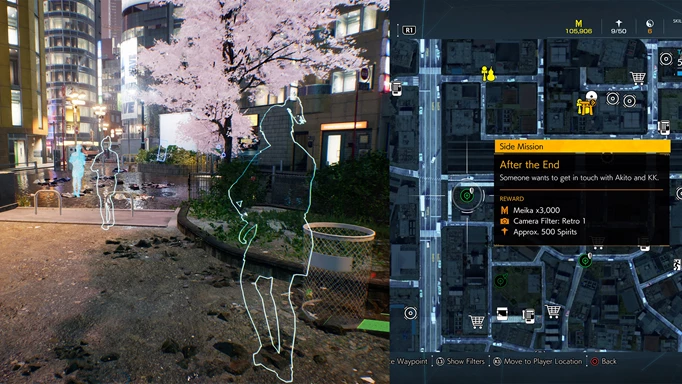
To begin this mission, you need to pick up a phone in the north-west of the map. It will be marked on your map as After The End I, and is found at the western end of the expressway that runs west to east. Pick up the phone to hear from Rinko, who has some leads for you to chase down. Again, keeping spoilers to a minimum here, but from this point, you need to head south to your objective. If you check the map, you will see a green circle indicating where you need to go next.
Head to this point and investigate the area. This will begin a new objective where you will need to follow the trail of a ghostly figure. This is pretty much the structure of all three of these side missions. Go to a phone, speak to Rinko, go to the objective, follow a ghost, pick up an object. In part two, this will include some climbing and gliding so be prepared to do some platforming.
The only snag is that while part two becomes available immediately after the first, part three does not. There are conflicting reports online about how to trigger this, but our playthrough it triggered when in proximity to the correct payphone. After completing After The End II, head to the Toyoi Shrine just west of where to quest started and you should hear a phone ringing. Check your map and the indicator should appear for After The End III.
Ghostwire Tokyo After The End: Mission Complete, And Bonus Ending
 Click to enlarge
With the final part of the mission complete, you are free to finish the game without fear of losing out. Completing this series of side missions for Rinko has a purpose later on, as doing this gives you the ending of her story. Once you pass the point of no return having done these missions, you will have a final encounter with Rinko. So, doing these missions is not only important for completionists, but for those who want the full story.
That is it, everything you need to know to complete the After The End side missions and complete Rinko’s story. For more on the game, why not check out how to play the game while wearing the Fallout 4 Vault suit in our Ghostwire Tokyo Fallout Easter egg guide.
