Destiny 2 Spire Of The Watcher Dungeon Walkthrough

Destiny 2 Spire of the Watcher is the brand new dungeon added to the game in season 19. Destiny 2 players have to take on the role of electrician and exterminator to complete this dungeon. Spire of the Watcher takes us to Mars and has us fighting Vex within one of Rasputin's facilities. Here is everything you need to know to complete the Destiny 2 Spire of the Watcher dungeon.
- Get the full rundown on the new exotic seasonal weapon, Destiny 2 The Manticore.
Destiny 2 Spire Of The Watcher: General Mechanics
 Click to enlarge
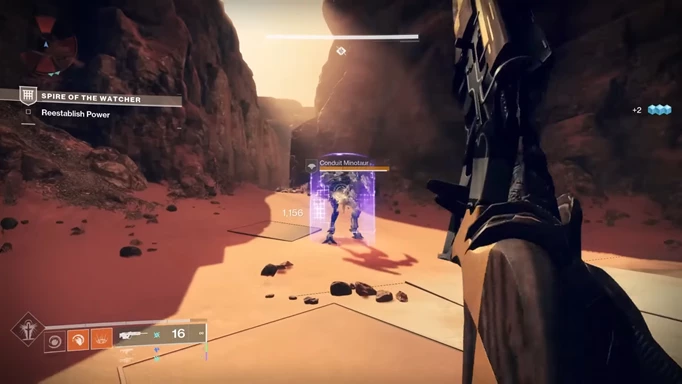
As with many other raids and dungeons, there are themes and mechanics that persist throughout Spire of the Watcher. The primary mechanic you will repeatedly encounter is using the Arctrician buff to power nodes along wires. Wires are powered by shooting the nodes along the wire while you hold the buff.
The Arctrician buff is gained by defeating Conduit Minotaurs and stepping into the circle they leave behind. Conduit Minotaurs will not appear if there is a Hyrda in the area, so be sure to take those out when they appear. While it is active, the Arctrician buff lets you shoot nodes to activate them, and hitting the correct ones will increase the duration of the buff.
There are two kinds of wires you will need to power, yellow and red. Yellow wires are present throughout the dungeon. They are powered by shooting the nodes in order, starting from the beginning and following the wire to the end. To find the start point, follow the wire. You will know you are at the first node by the flashing chevron symbol above it. Shoot the node to begin, then follow the wire. Shoot the rest of the nodes along the wire in order to power the whole thing.
Red wires don't appear until much later and work differently from yellow wires. Red wires do not need to be activated in order, instead, all their nodes need to be activated in a very short span of time. Whenever you encounter a red wire that needs to be powered, locate all the nodes then work together as a team to hit them all quickly.
- A new loadout system is coming soon, check out Destiny 2 Lightfall loadouts explained for more.
Destiny 2 Spire Of The Watcher: Enter The Spire
 Click to enlarge
The first part of the dungeon involves gaining access to the spire. There are a couple of small buildings bunched together, and the Spire is visible in the distance. In the ground between the buildings you will find a large door, and four nodes with yellow wires coming out of them. For each wire, you need to follow them to the other end to find the start point. Then, with the Arctrician buff, hit each node along the wire in order until you come back to the centre area.
The wires weave a complicated path through the area, and often overlap, so be sure to follow them carefully. Luckily, there is no penalty for hitting the wrong node, so don't be afraid to shoot them. The only constraint is the Arctrician buff, if it runs out then you need to go back to the Conduit Minotaur for another one.
Once all four wires are powered all the way back to the middle, the large door in the ground will open and you can progress. Head down through the door and follow the path. It can be a bit of a maze in there, but there isn't much of a puzzle in where you need to go. Make your way through the underground section to reach the next encounter at the Spire.
- Another new system coming soon are the Destiny 2 Guardian ranks.
Destiny 2 Spire Of The Watcher: Spire Ascent
 Click to enlarge
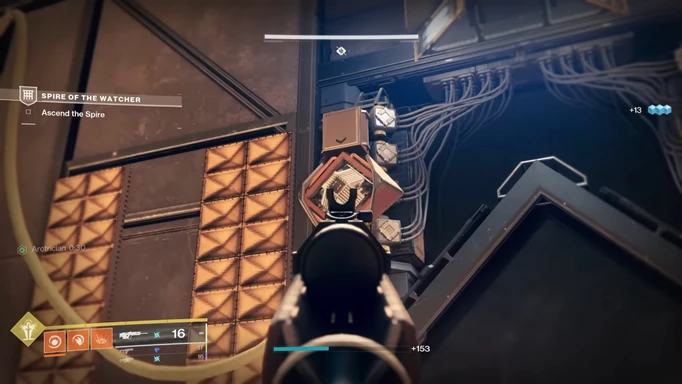
Now that we have reached the Spire, our goal is to climb it. Climbing the Spire is a remarkably similar process to the previous encounter, as it largely involves powering yellow wires. This section is much more vertical than the last one, so some platforming is required. Again, you can defeat Conduit Minotaurs to gain the Arcitrician buff, then go about activating nodes along the wires.
There are two wires that need to be powered up, so split up and follow each wire. There will be plenty of enemies along the way and in this area, they are much more of an issue than the previous area so it is a good idea to focus on taking them out as you go. Follow both yellow wires to the end to power a gravity lift.
This will bring you up to the next level, where you must repeat the process. Each level of the Spire is laid out differently, but the general idea is the same. Use the Arctrician buff to power the next lift, and continue upwards. Once done, you will find yourself at the top of the Spire.
- There have been big changes made to the Destiny 2 competitive Crucible mode.
Destiny 2 Spire Of The Watcher: Akelous, The Siren's Current
 Click to enlarge
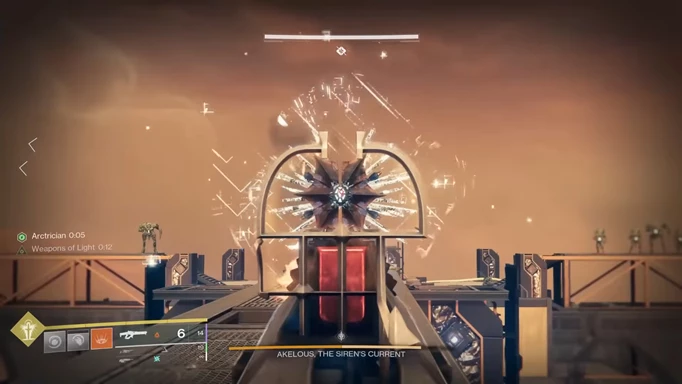
Now we are on to the first boss of the dungeon. Akelous is a giant Harpy, and for anyone who has completed at least half of the Garden of Salvation raid, this fight will be very familiar. At the top of the Spire there are four walkways going out in each direction. In the centre where the boss appears, there are four nodes at the beginning of four yellow wires.
Each of the wires winds its way out along each of the walkways to the end. Same procedure as before, follow the wire and shoot the nodes. For a team of three, each player should take one walkway each. Then, converge on the fourth one. When you power up the fourth wire, the boss will move out to the end of the fourth walkway.
This is where the fight becomes strikingly similar to Garden of Salvation. First, you need to shoot all of the glowing red eyes on Akelous. Once that is done, the Harpy will begin moving back towards to the centre. While it is moving, you can do damage. Linear fusion rifles are king in this scenario, as are any debuffs that you can apply. Shadowshot isn't very useful as the boss is moving, but Divinity shines here.
As you are doing damage, you will notice that a portion of the boss's health bar is a lighter colour. If you do not take at least that much health off the boss, it will use an attack that knocks you backwards. This can mean death considering you are on a narrow walkway at the top of a tower. It is very difficult to do the necessary damage to prevent this, so your focus is better spent on making sure you survive.
Provided you are standing on your walkway with some clearance behind you, you should be okay. Standing behind something will block the attack, and even standing in front of something big enough should prevent you from being launched backwards. The key to this is distance, the further you are from the boss, the less effective the shockwave is.
This is another reason why linear fusion rifles are great here. Do your damage from long range, and don't get close enough for the boss to launch you. Once it reaches the centre, the fight resets and you need to power the four wires again. Rinse and repeat until the boss is dead, simple as that.
- Click here to learn how to get Destiny 2 Rose from competitive Crucible.
Destiny 2 Spire Of The Watcher: Persys, Primordial Ruin
 Click to enlarge
Once Akelous is dealt with, it is time to climb down the inside of the Spire. Make your way down through the tower to reach the final boss, Persys. On the way, you will encounter red wires for the first time. This is a good place to get used to how they work, essentially the nodes on a red wire can be powered in any order, but must be powered in quick succession.
Typically, red wires have five nodes, so you will need to coordinate and you will need to be quick. There is some leeway with how long you have, but not much. Your team should plan out who shoots which nodes, again the order does not matter so fire when you like, just do it quickly.
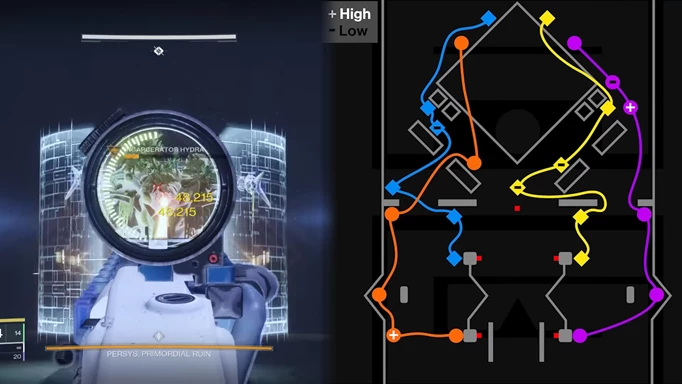
Once you have made your way to the end you will be at the Persys boss encounter. There are two rooms involved in this fight, the main room with four pillars, and the reactor room. In the main room, there are four yellow wires that stretch into the reactor room, and a red wire with five nodes. The four yellow wires start on the outside of each of the four pillars. There are four nodes from the red wire on the inside of the pillars, and the fifth is found above the main door to the reactor room.
The boss, Persys, has an invincible shield that needs to be taken down before you can do any damage, which is the main challenge of the fight. The first thing to do is take out the Conduit Minotaur and get the Arctrician buff. The whole team should grab the buff here, as there is a lot to do. Of the four nodes on the pillars at the start of the yellow wires, two will have the blinking light telling you they need to be activated.
Now, shoot all five of the nodes on the red wire to open the main door, as you need to boss to follow you in there. Then, follow the yellow wires from the two blinking lights, hitting all the nodes along the way. You need to bring power along those wires to the end, which will be in the reactor room. Check out the diagram above posted by /u/HoldenAGrenade to see exactly where each node on each wire is. Do this, but make sure the boss is in the reactor room with you when you activate the last nodes. Then quickly run back to the main room.
While the boss is in the reactor room and the power has been activated, the five red nodes will become active again. Shoot them all quickly to shut the door and seal the boss in the reactor room. An explosion will happen, destroying the boss's shield. When the door opens, you can finally do damage to the boss, until the shield regenerates and you need to repeat the process.
For damage, linear fusion rifles are still the way to go. However, this boss has a very small critical spot that is hard to hit. You will really need Divinity to get the most out of your damage. Shadowshot and any other debuff is a good idea here, as although the boss moves around a lot, it isn't so much as to make tethers ineffective. In lieu of that method, powerful rocket launchers like Gjallarhorn are another way to go. Go through the loop of taking down the shield and damaging the boss three or four times and you will complete the dungeon.
That is it for the Destiny 2 Spire of the Watcher dungeon walkthrough. To get prepared for the next big expansion, check out our Destiny 2 Lightfall release date guide.