Destiny 2 Divinity: How To Get

Destiny 2 Divinity is one of the most functionally useful weapons in the game, and a must-get for every Guardian. Destiny 2 has a long list of exotic weapons, but none have an ability like this one. Divinity does not do damage in a conventional sense, rather it creates a large orb on enemies for others to shoot and do critical damage. Here is everything you need to do to get yourself a Destiny 2 Divinity.
- If you need to get some exotic armour as well, check out our Destiny 2 Lost Sectors guide.
Destiny 2 Divinity: Starting the Quest
 Click to enlarge
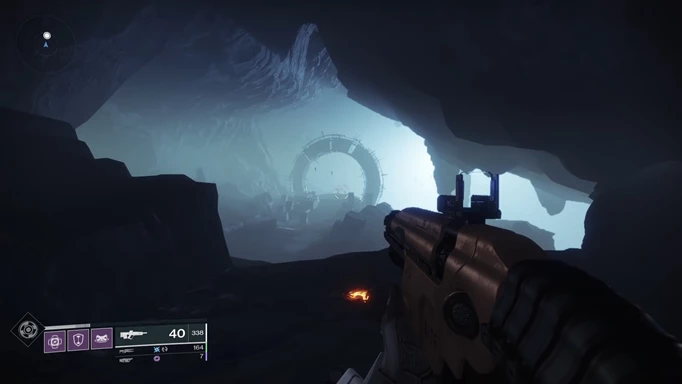
The path to getting Divinity is a bit of a long one, so we will move through these steps as quickly and succinctly as possible. Step one is to head to Sorrow's Harbour on the Moon. Head southeast to the Lunar Battlegrounds, and when you enter the area take an immediate left. In the corner, there is a cave entrance. Head through it and you will find yourself in the beginning area of the Garden of Salvation raid. Some Vex will spawn in, including a Gatelord. Defeat them, and the boss will drop an exotic item that begins the quest.
After this, you need to head to three Lost Sectors on Nessus. The first one is The Orrery in the north part of Artifact's Edge. Make your way through the Lost Sector, and before the stairs that lead up to the boss, jump up to the ledge on the left. Inside an alcove there will be some enemies, defeat them then interact with the Oracle. Some more enemies will appear, deal with them then interact with the Oracle again.
We have to do this again in two more Lost Sectors, next one is Ancient's Haunt, in a cave on the left about halfway through the Lost Sector. You can find Ancient's Haunt on the west side of The Tangle. The third and final Oracle is in the Conflux. As you make your way through this Lost Sector, you will enter a large room with a structure in front of you and large columns of white energy goo flowing upwards on the left and right. When you reach this point, go to the right and climb up the ledges to find the Oracle in a small room.
The last few steps before we head into the raid are simple enough. Next, we need to gather 120 Decryption Cores, which are acquired from defeating Vex. Seek out sources of Vex, such as Strikes or Lost Sectors, and keep taking them down until you have enough. Next, you need Phantasmal Fragments, 30 of them at least, to create an Empowered Decryption Core at the Lectern of Enchantment on the Moon. Phantasmal Fragments are dropped by Nightmare enemies, but can also be traded for with Helium Filaments. Once you have the Empowered Decryption Core, it's time to raid.
- To get up to speed with recent changes, check out our Destiny 2 Solar 3.0 guide.
Destiny 2 Divinity: Garden of Salvation Part One
 Click to enlarge
The last step of acquiring Destiny 2 Divinity is by completing some very specific challenges throughout the Garden of Salvation raid. There are seven challenges in total, and they each require a full team of six Guardians. These challenges aren't overly difficult, but they can be a bit awkward to complete. The challenges do not change the raid itself, so much as run parallel to it. You will need to complete the raid as normal, but during a Divinity run you need to complete these seven side objectives along the way.
What follows are instructions on how to complete these challenges. However, most of the challenges are very visually oriented, they mostly involve going to specific places and positioning yourself in specific ways. As such, a written description will only get you so far. At this point, I have to recommend you go to YouTube and grab a video guide for this section. There are many great video guides on this, Datto has a great video to follow along with. This guide will continue to outline the challenges so you know what the steps are, but the directions will not be too specific, as we don't have time to write an entire novel about this. Here are the raid challenges laid out fairly simply, with any details we think are important for you to know, that a video might have missed.
The first step is very simple. When you go through the portal at the beginning and enter the Garden of Salvation properly, you will have stairs ahead of you, and a cliff behind you. Just beneath you is a small room, so carefully jump off the cliff and then back in to enter the room. Inside there will be a security node. Interact with it and it will activate the challenges of the Divinity run.
The first proper challenge is just ahead, before the first encounter. Once you reach the top of the stairs, look to the left and right. There are small holes in the wall on each side. Three members of your team need to go into each of them. At the bottom of the left side, there is a node. Someone needs to stand close to it and shoot it, this will attach a tether of energy to them. This tether will spread to the next nearest Guardian with an unbroken line of sight. This is the main mechanic of most of these challenges, making links with these tethers between Guardians to form chains.
In this instance, you need to pass the tether up to a teammate standing at the window at the top of the room, who can then pass it over to a player standing at the window on the right side. They then pass it down to their two teammates. There is a receiver at the bottom on the right, and bringing the tether within line of sight of it will activate it and complete the puzzle. It sounds complicated written down, but it is fairly straightforward and a bit of fun. However, there are more to do and they only get more complicated.
The next challenge is a perfect example of this. After you complete the first raid encounter, you will be at the end of a large grassy area. Instead of moving forward, turn back and walk along the right side. You will see a tree with pink leaves, and beneath that you will find an entrance to an underground area. This area contains another tether puzzle, this one a bit more complicated than the first. A video guide is recommended for figuring out where to go here, but the general premise remains the same. Create a tether and thread it through to the end.
Where you drop down initially will be the end-point of the tether, so make your way through the area to reach the other five locations. The first three are fairly easy, four to six have to travel a bit further over to the other side of the area. The starting point involves going outside and coming back in through a cave. Use the various windows and gaps to line yourselves up, and remember that you can make adjustments on the fly. Get the tether back to the beginning to complete the challenge. This will drop the forcefield in the middle, and everyone can use the cave exit near the tether start point to exit the area.
Puzzle three is a little further ahead, but still just after the first encounter. After the previous challenge, you will find yourself heading down into what feels like an underground area filled with trees and strange plants that you can shoot to open up into platforms. On the right side of this area there is a huge branch with some of these shootable plants growing on it. Head up toward the top of the branch, and underneath you will see a spot to drop down, and you will find the tether box under the branch.
This tether puzzle is a bit easier and quicker. Once you activate the tether, six diamond-shaped nodes will appear in the area. You will need to organize your team in a pattern that passes the tether through all six nodes. What you need to know here is that, as you have freedom to move around, you can now create a full link with the tether. The first person who picks it up will pass it on to the second, then third, and so on, but player six will then be able to tether back to player one. Use this to create a full chain among you and link all six nodes.
- More changes are coming soon, here is everything we know about Destiny 2 Arc 3.0.
Destiny 2 Divinity: Garden of Salvation Part Two
 Click to enlarge
Encounters two and three of this raid take place in the same area, a circular room with eight long corridors that stretch out from a central space. Once you complete the third encounter and defeat the Consecrated Mind, you can complete the next few puzzles. The first puzzle is very similar to the last one, a Vex cube will appear near the central area. If you look down the corridor on the left or west side, you will find the cube just below the ledge, as there is no proper floor here. Shoot it to activate the tether, pass the tether between your teammates, then find a formation that links all of the nodes. Two of the nodes are in midair so will require some jumping, a Warlock or Titan will need to get these ones.
The next puzzle starts exactly the same way, so go back to the cube and create another tether. Once linked, head north towards the exit. You can jump your way across, but a simpler method is to take the corridor to the left and just go around the gap. On your way there, Supplicant Harpiess will spawn in. None of you will be able to use any weapons, and the Supplicants explode when they get near to you, so what you need to do is bait them into exploding, then get out of the way to avoid the damage. Once the Supplicants are dealt with, go to the nodes in front of the exit. They will be in an hourglass pattern, so match the pattern with your tether. You cannot overlap, so make sure all your tether lines are straight and unobstructed. This is an easy one, so get it and move on.
Press on through the raid, as there is quite a journey from encounter three to the final encounter. Along the way, you will be making your way up some cliffs. At the top of one of them, you will find a large clearing, with some statues, a pond, and two Vex milk waterfalls coming down from the cliff above. The way forward is up to the right, but we want to head into the cave between the two waterfalls, or milkfalls. This puzzle is another tether going from point A to point B.
The start point is a cube near the end of the cave, the endpoint is up to the right just after you enter the cave. Go down to the start point and shoot it, this will make the endpoint appear. Then, form a tether among your teammates from there back to the start of the cave, and up to the endpoint. The trick here is just to try and maximise the distance you can get out of the tethers.
With that done, we can tackle the final puzzle. This last puzzle is in the same cave as the previous one, so we are nearly done. Everyone needs to go to the end of the cave where the Vex cube is. You will see six circles on the ground, each with a glowing shape above it. Each member of your team will need to stand on each of these circles, but in a certain order. Activate the box to create a tether, this time it will link to a node opposite the cube. Some glowing white nodes will appear under them, and they will create a pattern through the circles. You and your team must replicate this pattern with your tether.
Stand in a straight line between the cube and the node when you activate the tether, this will give you an order to work with. Number one at the front, six at the back. Remember your number in the order, then watch the pattern form and find your position. If everyone gets it right, the pattern will be accepted. It is easy to see where things go wrong so mistakes can quickly be corrected. Do this seven times to complete the puzzle, and you are finally done with the extra steps.
Now, you need simply to continue on to the final boss of the raid and defeat it. Once done, enter the reward room and you will be able to present your Empowered Decryption Core at the chest on the right to receive your Divinity.
That is everything you need to do to get yourself the Destiny 2 Divinity. For more on the exotic weapons of the game, check out our Destiny 2 Osteo Striga guide.